By Digital Learning Specialist Amelia
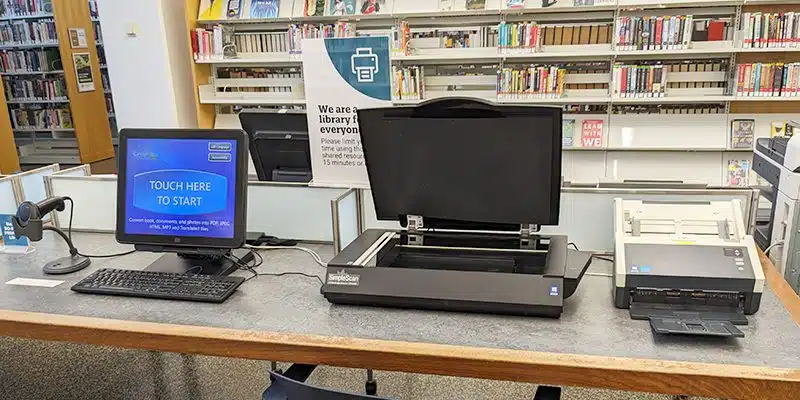
Did you know? You can scan documents for free at any Oak Park library location. Scan equipment is available on the Main Library’s third floor and at the Maze and Dole branches.
Using the scanner, you can send your scan to copy (print), fax, email, save to a USB, or scan to the cloud storage. Next, let’s learn more about the scanner’s many functions and how to navigate the station.
Follow these step-by-step instructions
First, select your scan destination
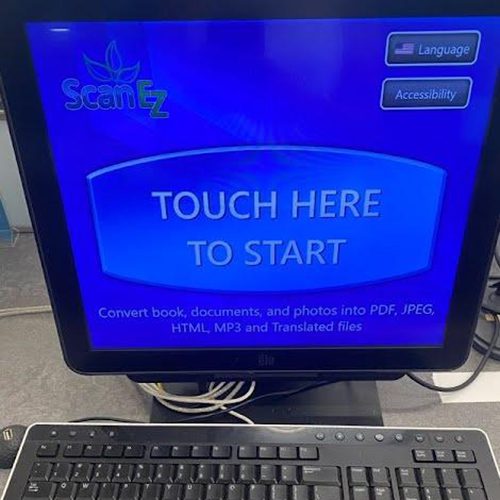

Step 1: To use the scanner, simply touch the touchscreen.
Step 2: Tap and choose your scanning method:
- Flatbed scanner: Best for scanning one page, an ID, book, or manual.
- Document feeder: Best for scanning multiple pages.
Then tap Next.
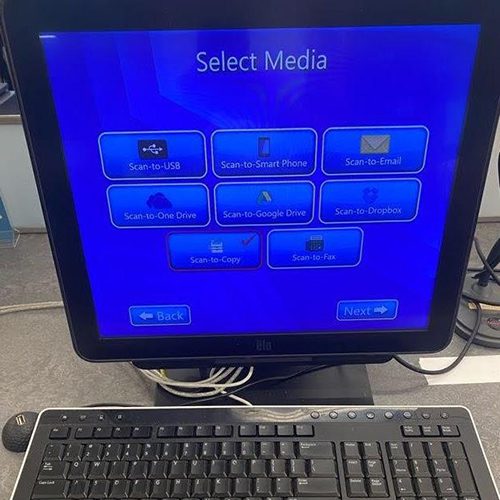
Step 3: Tap and choose your scan destination:
- USB: Save as a digital file to an external drive.
- Smartphone: Sent to your smartphone using a QR code.
- Email: Send as an attached document in an email.
- One Drive, Google Drive, or Dropbox: Save as a digital file (you must already have an account and know the username and password).
- Copy: Print a copy of the document.
- Fax: Send the document via fax.
Then tap Next.
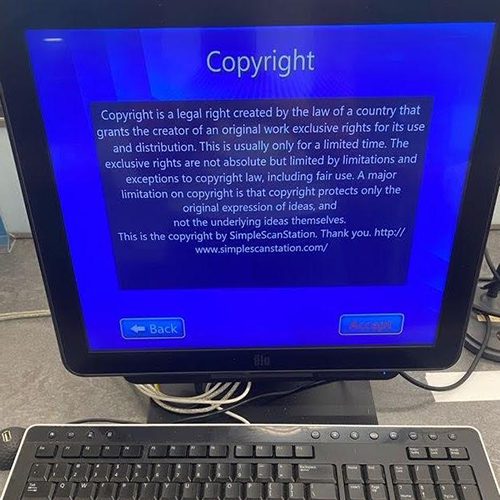
Step 4: Read and accept the copyright. Tap next.
Next, follow the steps for your selected scanning destination
Step 5: Depending on the selected scanning destination, you will have different options moving forward. Follow the steps below for the scanning destination you selected in the previous steps.
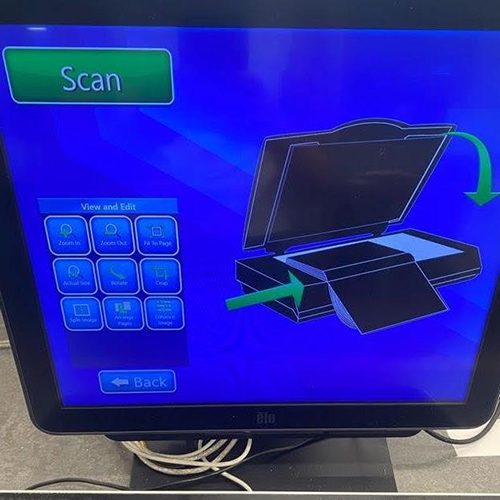
Scan to copy (print)
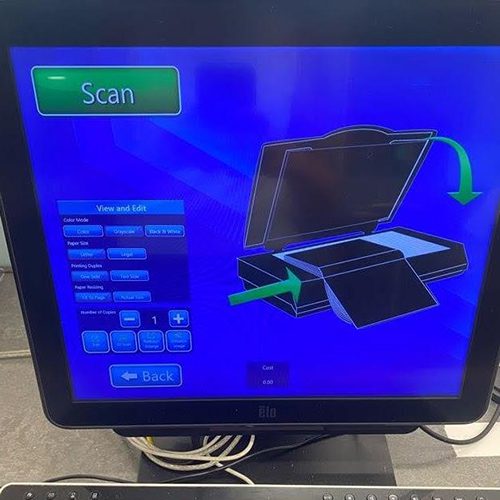
- Scan your document(s) and in the view and edit box choose your output (color, paper size, printing single or double-sided, paper resizing, and number of copies).
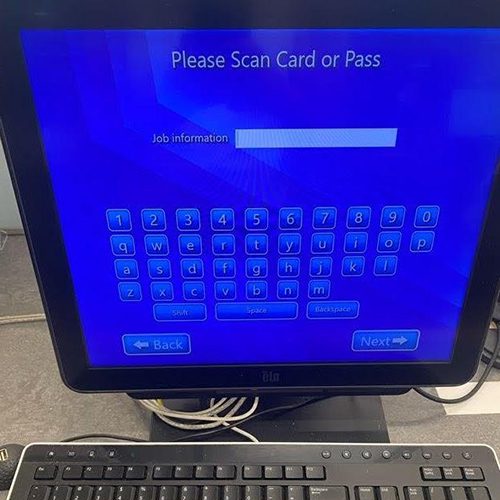
*Note that there is a price at the bottom of the screen. We do not charge for printing but give daily credit to each library card ($5 = 50 pages) and guest pass ($2.50 = 25 pages). You can print up to your designated limit for free. Learn more about print limits » - In the field labeled “job information” scan your library card or guest pass and then tap Next.
- Take your library card or guest pass to the printing kiosk and scan it there. Your print job will appear and then you can tap print all to release the jobs.
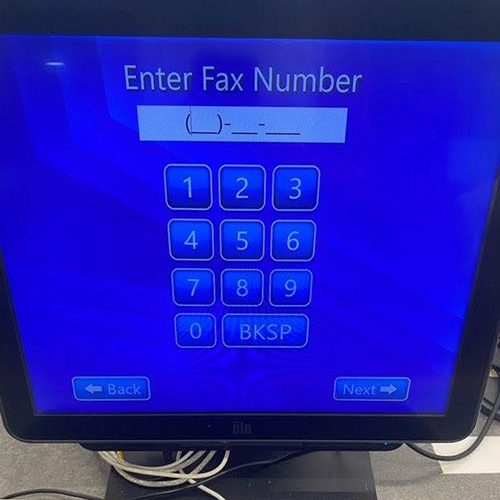
Scan to fax
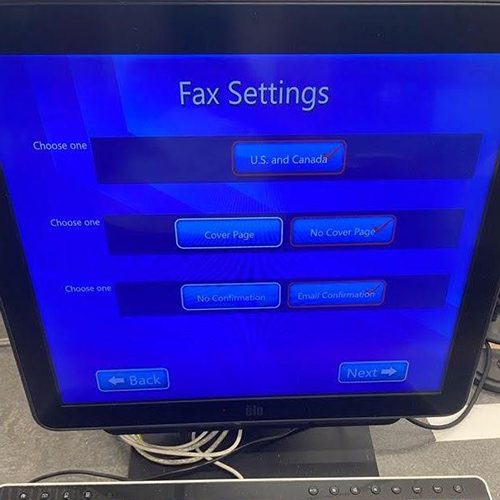
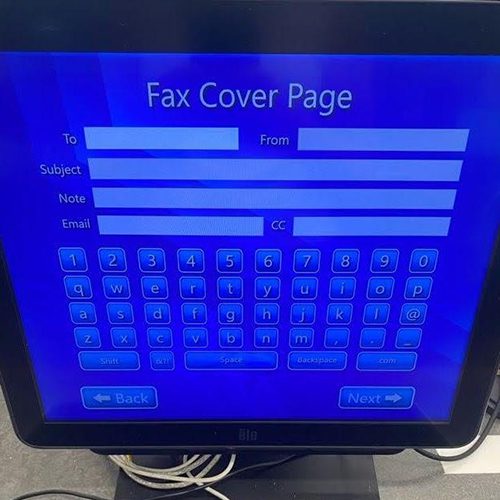
- Choose your fax settings:
- You can only fax to numbers in the U.S. or Canada with a limit of 10 pages per session.
- Decide if you want a cover page or not. On the cover page, you can include your name, the name of the recipient, a subject line, and a note.
- If you would like an email confirmation, you will need to enter your email in a later step.
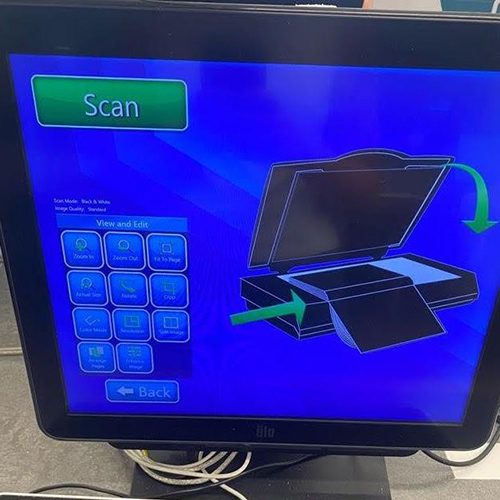
- Scan your document(s), using the tools provided as needed, and when you are satisfied with the preview, tap Next.
- If you chose to include a cover page, fill out the cover page information and then tap Next. Please note: You need to put your email address in the email field in order to get a confirmation message that the fax was successful.
- Enter the fax number and then tap Next. The fax will send and then the confirmation will be emailed to the email address you provided.
Scan to email
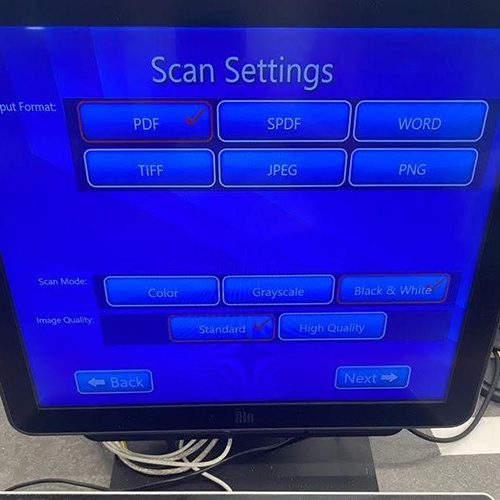
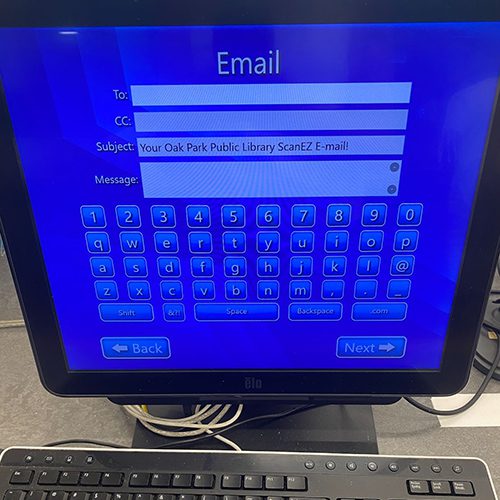
- Select your scan settings:
- Output format: the file type you’d like to attach to the email.
- Scan mode: whether you’d like the file to be in color, grayscale, or black and white.
- Image quality: standard or high quality
- Scan your document(s), using the tools provided as needed, and when you are satisfied with the preview, tap Next.
- Type in the destination email address, change the subject line, or add a message if desired. Then tap Next, and your document will be emailed.
Learn more about printing, copying, scanning, and faxing at the library »
Have a tech question?

About Amelia
Part concertgoer, part bibliophile, part audiophile, half theatrical skills, half creative journaling. Amelia is part of the digital learning team as a specialist who seeks to bridge the gap between informal and formal digital literacy by emphasizing “we will learn together.”